Building a Dog Ramp
I first built a dog ramp when our husky mix became too old to use the stairs. Well, actually two ramps: one from the dog door to a landing, then another from the landing to the ground.
I found a few pages on the web about how to build a ramp, but every one of them uses plywood. I really, really dislike plywood. It seems to fall apart to quickly. My original ramp was plywood, painted. It looked great at the time, but this is what it looks like now (and why I need to rebuild it):


Whenever the dogs step on it, it gives a little and I’m afraid they’re going to fall through soon.
So this time I’m going to build a really solid ramp without plywood. Since it will be incredibly heavy, I made two removeable sections of slats. That way I can take them off first before lifting the shell of the ramp if I ever have to move it.
Wood
I went around and around about what kind of wood to use. For environmental reasons, I didn’t want to use pressure treated wood, but ended up going that route.
I learned a LOT about pressure treated wood through my research. You should do your own checking, but here are some of things I found:
- The PT wood of today isn’t as toxic as the PT wood prior to 2004 (which used arsenic). Today the PT wood is safer. but there are still different types of treatment. I was looking for ACQ.
-
I got my wood at Lowes. The best way to figure out what type of PT wood they have is to look on their website. When I asked the guy in the lumber department if it was ACQ, he had no idea what I was talking about and I had to explain to him that there are different PT treatments. He said he didn’t think so and I should go to a lumber yard to get something special like that. I ended up buying what they had. The sticker on the side of the lumber did not say, but when I looked up the wood later on their website, I found it was indeed ACQ.
-
Again, don’t just accept what the staff tells you without doing your own research: As you probably know, fresh PT is wet. He said I need to put it outside in the sun for for a few days before painting it. He told me two 80 degree days in a row should dry it out enough to paint. WRONG, Wrong, wrong. Online I later found that you need to wait months before painting or staining. BUT you can seal it right away if the sealant says it can be used on fresh PT wood. In fact you should do this while the wood is still wet because PT wood is notorious for warping when it dries. The reason is that it dries at different rates, but the sealant will keep it more uniform and prevent warping.
One type of sealant that can be used on fresh PT wood is Wolman’s Oil-Based Raincoat. They also sell a water-based sealant, but the one you want for fresh PT wood is the oil-based in the green can. I could only find it online (I bought it from Amazon), so by the time it came, my wood had dried and warped a bit. But I still wanted to seal it to keep the PT chemicals from leeching out into my yard over time.
- Very important: A side effect of the new chemicals for treating wood is that they break down the ordinary galvanized nails and screws. I found this was true because when I went to unscrew an ordinary external screw in my old ramp, I couldn’t budge it. It felt as if it had been fused into the wood, and I had to cut it out.
With today’s PT wood, you have to use nails/screws that are either stainless steel or ‘hot dipped galvanized.’ When I went to HD, this time I talked to a very knowledgeable person. He showed me the screws he uses with PT wood, and I love them! They have a star pattern instead of the typical phillips, which means they don’t strip at all (they come with their own drill bit that fits it). He said he’s taken them back out when disassembling a project and can just toss them back in the box and use them again. And they can be used for PT wood.
It’s this:
GRK Screws


Building the Dog Ramp
The following will make a ramp 8 feet long and 18 inches wide. We also needed guide rails because one of my dogs fell off the old ramp.
You will need:
(4) 2x4x8s (two are for runners of the ramp. Two are used to make detachable slat segments)
(4) 2x6x8 (although in hind sight, I could have used 1x6x8s. These form the slats)
1 strip of outdoor carpet, 8.5 feet long and 18″ wide. (It usually comes 12 feet long and even feet wide, so you have to trim it)
(2) 1x4x8 (for guard rail posts)
(4) 2x2x8 (for guard rails, although 1x1x8 is even better if you can get it)
1x1x18 piece of wood (can be scrap wood, used to attach the carpet to the top slat).
1 can of Wolman’s Raincoat (if treating your wood is desired)
paintbrush
1 box of #9 2 1/2″ GRK screws (for attaching the slats to the 2×4 runners)
1 box of #9 2″ GRK screws (for attaching the guard rails to the posts. Note if you use 1×1 for the rails, you need shorter screws)For us, we attached the ramp to a landing instead of having it be free-standing on the ground, which means we needed:
(2) joist hangers for 2x4s (make sure you get ones designed for today’s PT wood. At HD, they have Z at the end of model number)
8 1.5 inch joist nails (Make sure these work with today’s PT wood. Must be hot-dipped galvanized. HD sells the right ones in the same place as the joist hangers).- Cut your 2x6x8 wood into 18″ long sections.
- If guide rails are needed, cut your 1x4x8 into three equal sections.
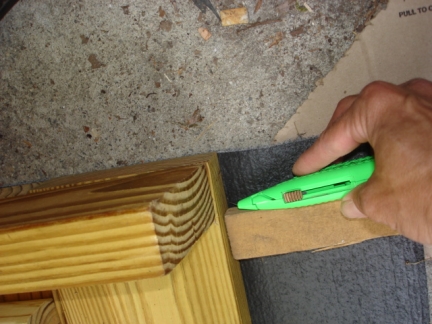
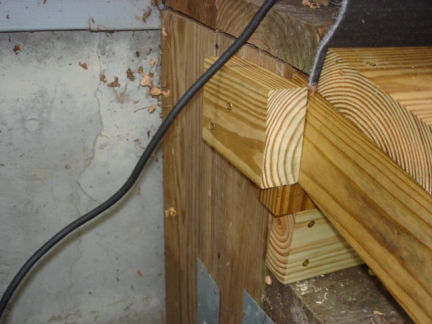
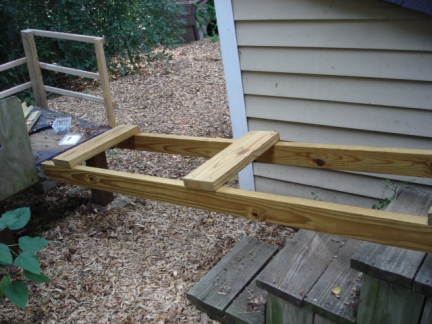
- I beveled the edges of the 2×4 runners so that they would fit more snugly when installed.
(I now this picture looks like it is a rounded bevel, but it’s just an optical illusion; it’s a straight cut). The way I did it was not very scientific: I just cut a small bit at an angle, then went back and held it up where it will go. If needed, I cut a bigger angle, etc. until it fit nicely.

- Treat your cut pieces and your 8 foot long 2x2x8s with Wolman’s Raincoat. You should have 24 hours of no rain, but you can start assembling the pieces in a few hours.
- Cut your carpet 18" wide x 8.5 feet long. It cuts very easily with a utility blade and straight edge.
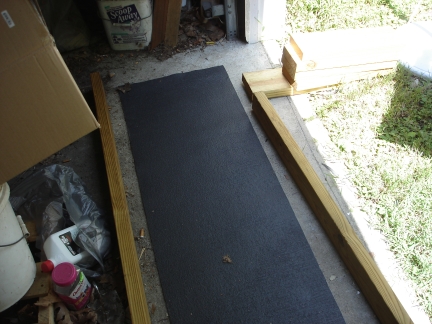
- I wanted to attach the carpet to the top slat, but wanted to make sure it hung evenly and didn’t go off the side of the ramp. So I assembled the ramp upsidedown in the only level place I could find big enough: the garage.
First I put the strip of carpet down, good side down. Then I lay the slats on top of it, and the runners last.
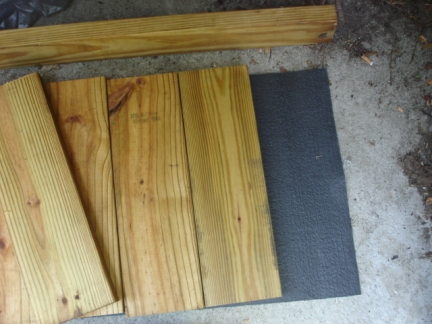
By the way, I read online that you want the curved lines of the wood to be facing down on the finished ramp, like an upsidedown U. So in assembling this upsidedown, I put them facing up, like a regular U.

Notice how warped one of the 2x4s got while I waited for my sealant to come. When I made the ends of the 2x4s exactly 18"e; apart and matching the width of the slats, the center of it really curved inward. But for this project, no matter.
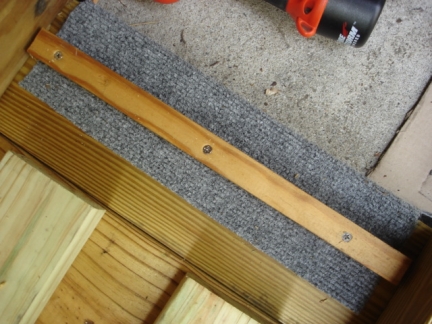
- Once I got all the wood positioned the way I wanted it, I made my removable sections by screwing two sections of 2x4s (about 26" long) onto the bottoms of five consecutive slats. I planned to have one attached slat at the top, and middle, two attached slats at the bottom, and two sections of five slats each that can be removed.

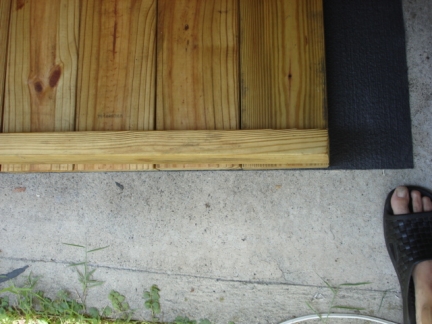
- To attach the rug, I cut out a rectangle so that I could fold it over the top slat, avoiding the runner. (I’m using a piece of wood as a straight edge in the picture). Then I put a piece of scrap wood on top and screwed it through the carpet into the slat.
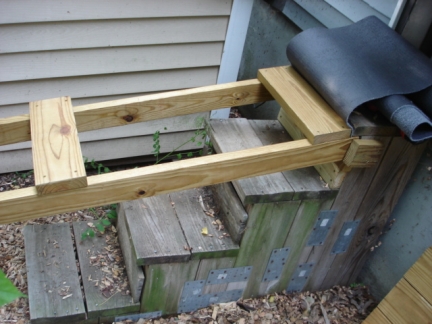
- Next, I inverted everything the right way, rolling up the carpet to the secured end to get it out of the way. After I had everything lined up exactly right and as square as I could get it, I screwed in the remaining slats, attaching the second-to-bottom, but leaving the bottom one off for now to make sure it fit exactly right to the landing.
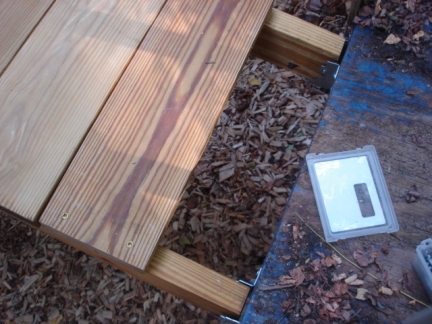
- I decided not to attach the dog ramp but just have it free-standing. That way I can remove it easily if I need to. So one the stairs, I attached pieces of scrap wood for the runners to sit on, and also put some side pieces so they can’t slip side-to-side.
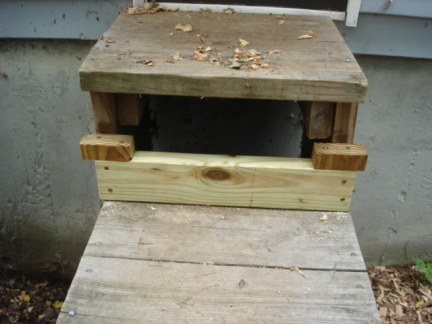
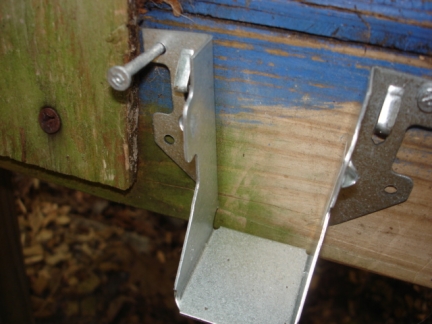
- On the other end, I used the joist hangers so that the 2×4 runners would fit into them, but would be lower. I planned for the top of the slats to match the height of the landing, but I misjudged the hangers a bit so it’s a little off. But that’s ok. (Here’s an aside about joist hangers. Don’t be tempted to use screws instead of nails. I always thought screws were better for everything, but here’s the difference: screws will stay in better than nails BUT nails have a higher sheer strength, which means it’s harder for their heads to pop off. Since joist hangers have a lot of weight pulling down on them, you want nails which have a higher sheer strength. That’s another thing I had to teach the guy at the hardware store.) Again make sure you use hot dipped or nails that specifically say they are appropriate for treated wood.
Now that the ramp is sitting in place, I cut my last slat so that it was the right width (my ramp is actually more like 7 feet 4 inches and needed a slat narrower than the width the lumber came in).
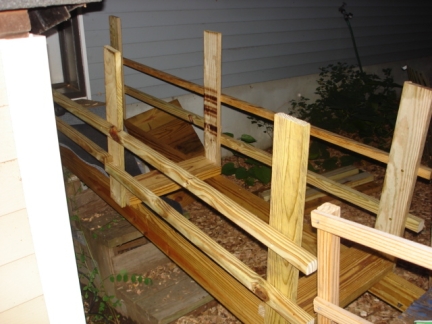
- Lastly, screw in the pieces of 1×4 to use as posts. Make sure you attach them at the ramp where the permanent slats are so that you don’t block the opening where the detachable slats need to slide in. Attach the guard rails to them. Also make sure the bottom rail is high enough so that you can still slide the detachable segment under it. Note: I plan to have another level of guard rails at some point so that posts aren’t bare at the top; I think it will look better. But since my older dog is pretty short, it isn’t needed right away.
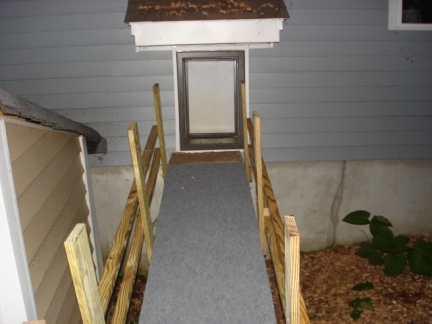
Slide in the detachable slat segments, roll down the carpet, and ta-dah!
