Building the Mouse Condo
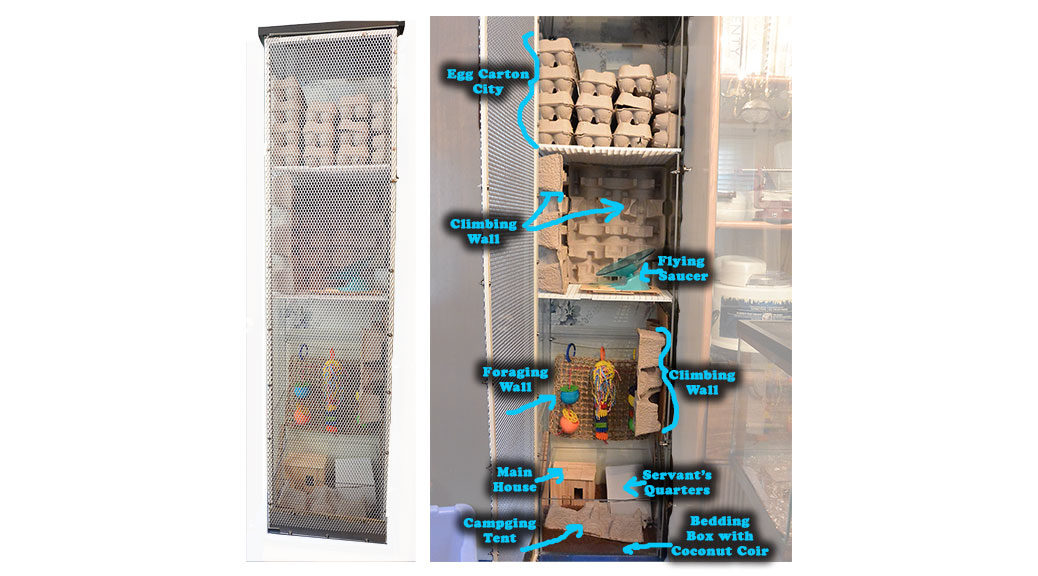
After seeing a really cool YouTube video of a mouse cage complete with climbing walls (see the end of this post), I wanted to do something similar for my mice. I read that a lot of hamster owners buy an Ikea Detolf glass display cabinet. Since hamsters don’t jump, they assemble it without the door and use it as an enormous five-foot long aquarium for only $60. But I don’t have that kind of space, so I decided to do the same thing but set it up vertically.
My goal was to have something as non-toxic as possible. For me that meant: as little plastic as I could and NO galvanized anything.
You will need:
Tools
- Drill bits
- Clamps
- Wire cutters
- 2 pieces of scrap wood, at least 13.5″ x 2″
- Magic marker
- Wire bending jig
- Vise (optional)
Table (optional):
- 1/2 inch plywood, 16″ x 17″
- Four equal length wood pieces for legs (I used 3″ x 3″ posts, 7.5″ long)
- Wood glue
- Wood screws
End Cap Protectors (optional, but recommended):
- 2 pieces of extruded acrylic (plexiglass) 3/32″ (.098) thick, 15-3/8″ x 14″
- 4 cable clamps 3/16″ (I got a pack of 20, the rest are for hanging shelves).
Acrylic Bedding Box (optional):
- 2 pieces of 1/4″ acrylic, 12.5″ x 7″”
- 2 pieces of 1/4″ acrylic, 13.5″ x 7″
- 1 piece of 1/4″ acrylic, 14″ x 12.5″
- Weld-On 3 and applicator
Cabinet and Shelves
- iKea Detolf Cabinet (the cheapest is to order it from iKea, not Amazon, and either have it delivered or pick it up)
- 4 cable clamps for each shelf
- Egg crate (sold at Home Depot) Update: I think they also sell it at Lowes, but they don’t call it egg crate. The brand name is Plaskolite.
Door
- 60″ Screen Kit, 5/16″
- 26 stainless steel machine screws, pan head, 3/4″ long, #6
- 26 stainless steel nuts, #6
- A box of 100 stainless steel washers, #8
- 60″ aluminum car grill, 18in. x 60in. Hexagon XXL Grill Mesh Sheet – Silver from Custom Car Grills
- 2 Extra wide door hinges
- Aluminum flashing, 14 3/4″ wide by approx. 3 or 4″ tall
- Metal coat hanger
- 4 Strong Magnets with Knobs
Getting the Plastic
I wanted to build an acrylic box for the bottom to hold bedding. It’s really easy to do. The hardest part is cutting the acrylic because if you don’t get it 100% square, the cement won’t work. This time, instead of buying the plastic from Home Depot and then cutting it myself, I had Tap Plastics cut it for me. They’re a chain on the West Coast that deals in everything acrylic. Their cuts are perfect and it’s cheaper than buying it here, even with the shipping. For the bedding box pieces, I went there in person when I happened to be in San Jose. For the end caps, I had them shipped to me.
I’m putting this as the first step so that you can do the rest while your order is shipping. Note: the bedding box exactly fits between the vertical bars of the cabinet but is a tight squeeze to pull it out through the open door without tipping it. You’ll end up with a box 14″ x 12.5″ x 7 1/4″ but if you want so make it slightly more narrow to make it easier to pull out, use 13 1/4″ wide instead of 13.5″.
You can order from here:
Tap Plastics
You should also order Weld-On 3 now because it must be shipped by ground. Note: I don’t know if TAP will make a box for you, but if they do, it would be the simplest way.
Finding the Stud
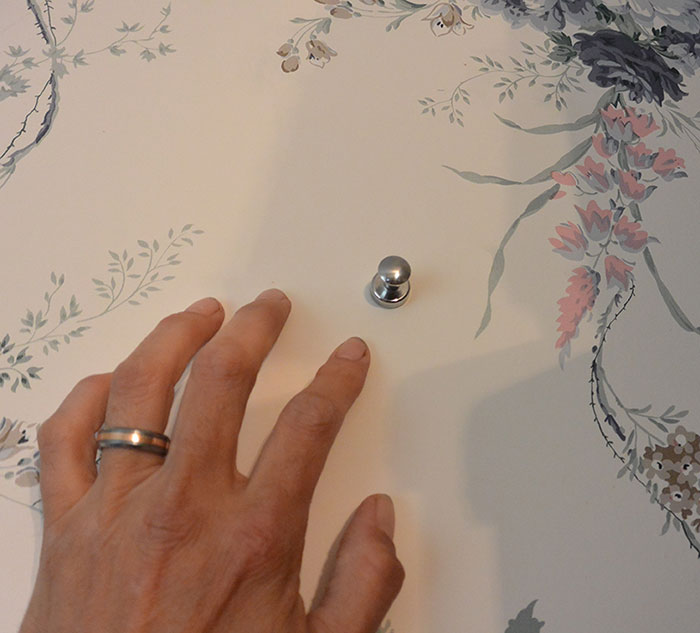
Since the cabinet is so heavy with all that glass, everyone recommends you bolt it to a stud so it won’t accidentally tip over. So the first thing I needed to do was find the stud. There’s a super simple way to do this. Just take a magnet and run it along the wall until it sticks. This will be where there’s a screw holding the drywall in place, which is normally in the center of a stud. I did this in multiple places and connected the dots. I drew a vertical line with a pencil from 6 – 10 inches off the floor for the table and at around 70 – 75 inches from the floor where I’ll bolt the top of the cabinet.
Building the Table
I wanted the cabinet to sit off the floor a little so I could use the space for storage but also so that a mouse couldn’t just escape and bolt along the floor. I wanted at least 7.5 inches of space to fit my mice carriers. My very simple table was made from spare wood: I cut four legs of equal length from some leftover posts and attached it to a rectangle of 1/2″ plywood. The easiest way to do this:
- Lay the plywood on the floor.
- Glue the legs in place with wood glue.
- After it has set enough that the legs won’t just fall off when you flip it over (about 10 minutes), invert it and use wood screws through the top of the table to secure the legs.
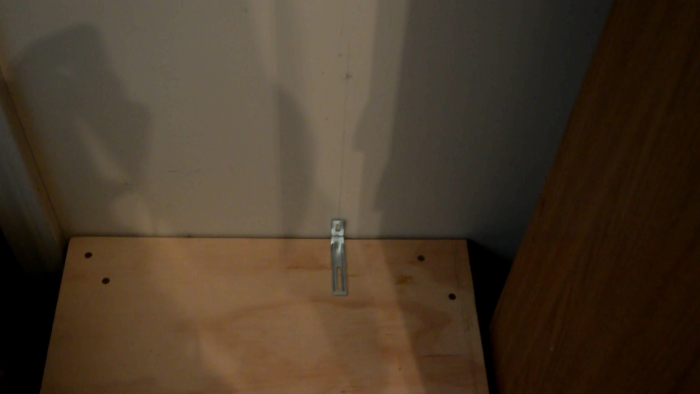
After the table was made, I bolted it to the stud using a bracket that came with the Detolf.

Preparing the End Cap Protectors
Note: Save the blue plastic that covers the acrylic.
This Detolf is all glass and metal except for the wood end pieces. My little guys will have a great time chewing them, so I wanted a very thin piece of acrylic as a protection. Technically they can probably chew through acrylic, but I’ve read that it’s hard for them to chew flat pieces. I want the metal rods of the cabinet to go through the acrylic, which means I need to drill holes in the acrylic that exactly match the predrilled holes in the wood.
Through trial and error, I found the easiest way to do this:
- Open your Detolf packaging and remove one of the wood end pieces.
- Find a drill bit that exactly matches the predrilled holes (the four smaller holes in the corners of the wood piece)
- It would help if you also had a bit that matched the larger hole at each side of the front (I didn’t have one that big so had to fudge it).
- Place the plexiglass on the good side of the wood piece. Position it so that the acrylic just comes to the edges of the grooves but does not obstruct the grooves in any way. The acrylic can go past the front of the base, just not past the grooves on the sides or back.
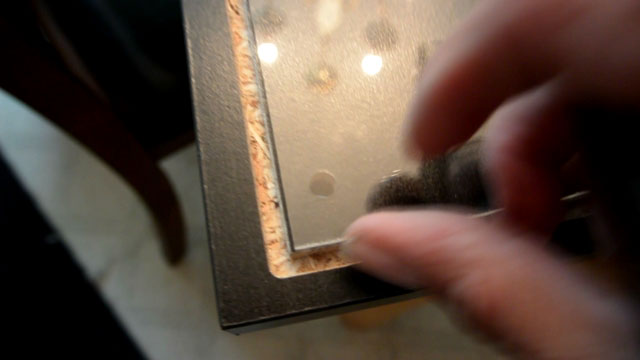
- Carefully clamp on a piece of scrap wood so that it covers the two holes on one side. Do the same on the other side. Be careful not to let the acrylic shift at all.
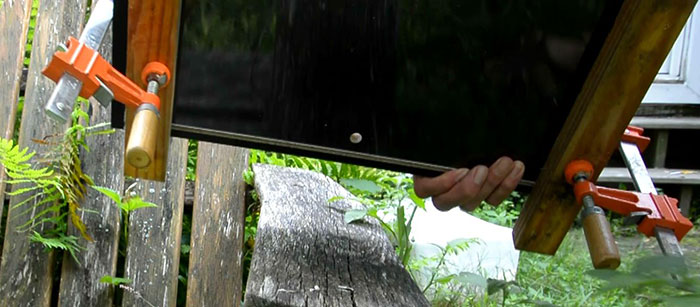
- Invert the whole thing
- Insert the drill bit into each of the four holes until it is touching the plexiglass, then drill through the plexiglass into the scrap wood.

- When you’re done, remove the clamps and scrap wood.
- Decide what side you want your door to hinge to swing on. Still making sure the acrylic lines up perfectly with the wood pieces, use the magic marker to indicate on the acrylic where the larger hole is under it.
- Remove the wood piece. Put scrap wood under the large hole mark and drill the plexiglass. Note: I didn’t have a drill bit big enough so I used the same bit for the smaller hole and then used a Rotozip bit to widen the hole.
- Do the same for the other end wood piece. You can use the same wood piece as a template for drilling your holes, but keep in mind that you’ll be using the other large hole. So for example, if you want the door to swing on the left, it means the door hinge will go in the left hole on the bottom, but the right hole on the top (which will be on the left when it is inverted).
- Make sure you test the door hinge holes: make sure the small corner holes all line up and that the little metal top hat that comes with the door hinge fits in the bigger hole. If it doesn’t match, you have to tweak the hole a little until it does using a file or Rotozip bit.
Assembling your Detolf
Follow the instructions to assemble your Detolf cabinet, but also put the end cap protectors against the wood end pieces.
This is what I did:
On the bottom, I wanted just a little extra protection. If one of my mice gets between my bedding box and a glass side (which she probably will), and then pees (which she probably will), I don’t want the liquid to ruin the wood bottom by getting between the acrylic and the glass wall. So I used the blue plastic that protected my plexiglass during shipping. First I lined the wood with two overlapping pieces. Then I poked the four holes through the blue lining with a finger to make them easy to find, lined up the acrylic end cap protectors, and put the two metal trellises (for lack of a better term) through the holes.
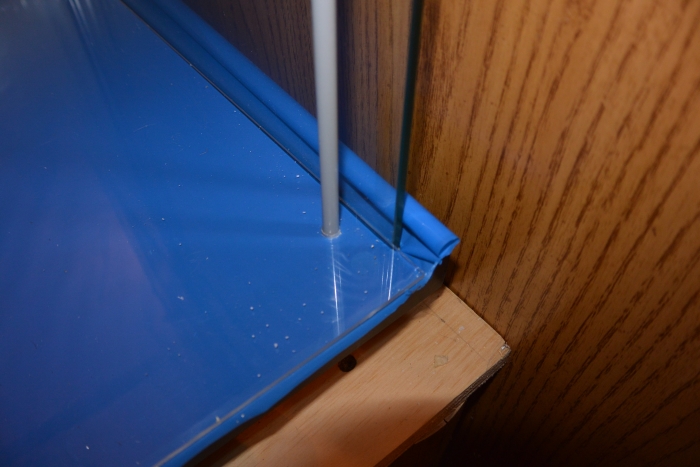
Continue assembling the Detolf as instructed until you get to the top end piece.
For the top, I recommend you do this:
-
- Put a cable clamp on each vertical bar about 3 inches from the top. TIP: If you have one of those handy screwdrivers with the removable end piece (Phillips or slotted), the end of the shaft is actually a wrench that will fit the nuts on these clamps. It’s much easier than using a standard wrench.)

- Fit the acrylic end cap protector over the four vertical bars and let it slide down until it is resting on the clamps.
- Fit the wood end piece on the cabinet as instructed. Do NOT attach the nuts on the top of the cabinet yet.
- Slide the protector up. Note: if it doesn’t go, your hole may be slightly misaligned. You may have to remove it again and tweak the hole.
- Holding the protector against the top wood piece. use the other hand to loosen the cable clamps, slide them up against the protector, and tighten them.
- Put a cable clamp on each vertical bar about 3 inches from the top. TIP: If you have one of those handy screwdrivers with the removable end piece (Phillips or slotted), the end of the shaft is actually a wrench that will fit the nuts on these clamps. It’s much easier than using a standard wrench.)
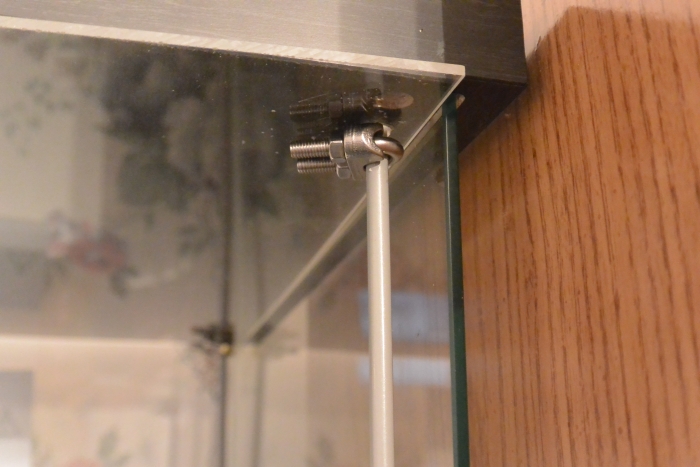
Building the Door Frame
I used one of those DIY window screen kits for the door sold at Lowes or Home Depot (or online). They come with four long pieces of rather flimsy aluminum and four plastic corner connectors. I used a hack saw and miter box to cut the vertical pieces to 59.5″ (if you aren’t using end protectors, cut it 3/16″ less.) The horizontal pieces I cut to 13 5/8″.
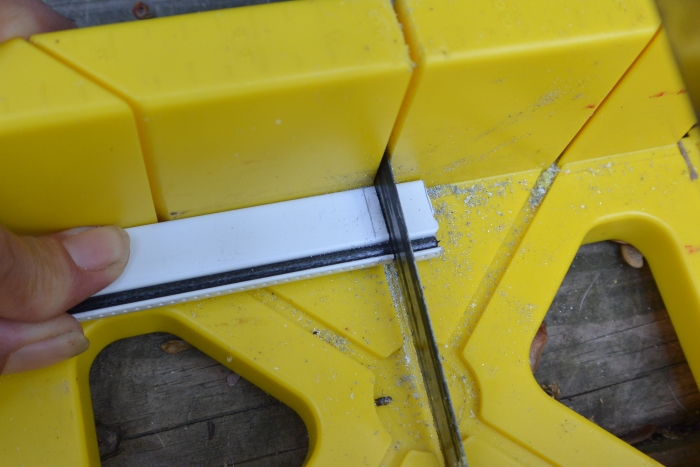
Use the four corner pieces to connect them and make a little door.
The door hinges that come with the Detolf aren’t wide enough to accommodate the new frame, so I had to get extra wide door hinges. Attach the new door hinges to the frame so that the black gasket that normally holds a window screen in place is on the outside (I’d rather look at it than have my mice chew it) and the door swings the direction you want. Make sure you use flat metal piece that comes with the hinge in between the frame and the hinge screws. This is to protect the frame from getting gauged by the screws. I put the hinge right up close to the corner of the door. Tighten it until it is snug, but not too tight.
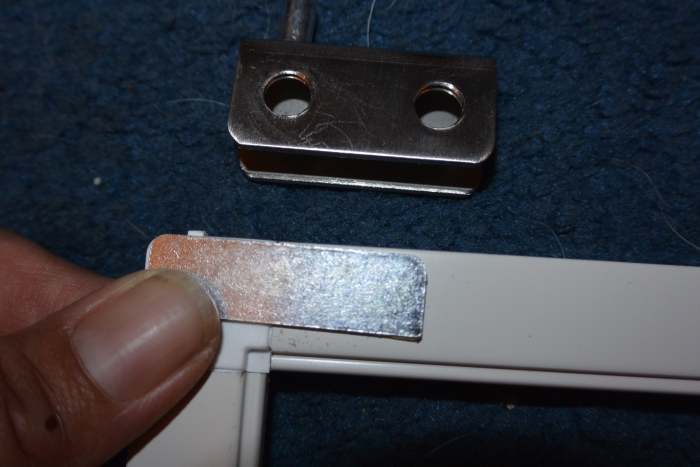
Dry fit the door into the cabinet. Do this by first putting the hinge ‘top hat’ into the hole in the bottom (through the acrylic). Put the other ‘top hat’ into the hole at the top, fitting it through the acrylic. (Note: if it falls out, just put it on top of the hinge itself instead.) Fit the bottom of the door into the top hat and then carefully lift up on the top wood end piece to allow enough room to slide the top hinge in place with the top hat setting into the top hole through the acrylic. Make sure the cabinet walls and vertical bars go back into their proper places in the wood end piece.
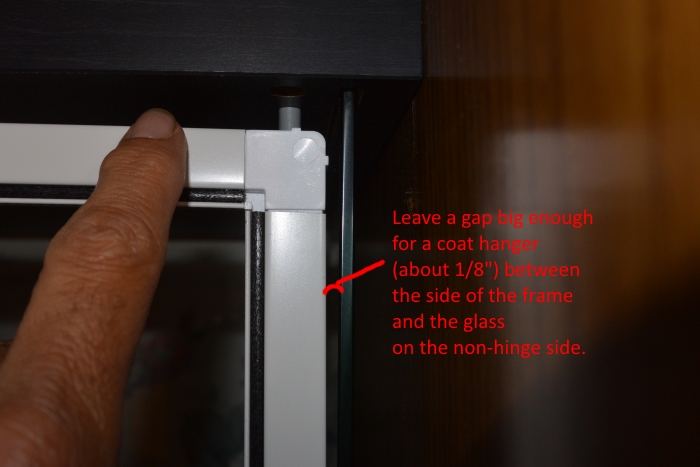
Test the door. You want it so that when the door swings, the hinge side does not hit the glass wall. On the non-hinge side, you need a little bit of a gap between the side of the frame and the glass wall, about 1/8″–big enough to fit a coat hanger wire. If you need to, tweak it by loosening the screws of the hinges and carefully nudging the door one way or the other just a tad within the hinge. Make sure to tighten the hinge screws again. You may need to remove the frame and shave just a little bit more off the height of the frame if it doesn’t close freely or if the top wood piece doesn’t set all the way down. Once the door fits the way you want it to, tighten the hinges a little more.
Attaching the Grid
Once you’re sure the door frame is the correct size, it’s time to attach the grid.
I thought long and hard about what to use for the grid. Most people just get hardware cloth from Home Depot, but I didn’t want to because everything they sell is galvanized, which means treated with zinc. This is a poisonous substance. Even the stuff that’s coated with nylon is galvanized underneath. I wanted either aluminum or stainless steel. I did find a couple of companies online that made hardware cloth in both of these materials, but they had a minimum order amount. I only needed enough to accommodate the door.
I ended up going with a car grill. There’s a company called Custom Car Grills.com. They sell a big rectangular sheet of grill material made of aluminum. It ships flat so no need to wrestle with trying to unroll the mesh. I got samples first and found that the size of the openings is great; too small for a mouse to get through. They sell both straight aluminum and black gloss which is powdered coated. I went with the straight because they told me the powdered coated grills first go through an acid bath to make the coating stick. If I’m going to all this trouble to avoid zinc, I’m not going to take a chance on something that went through an acid bath.
The pattern I bought is Hexagon XXL Grill Mesh Sheet. It was one of the only sheets that was long enough (60″) and had small openings. It was just a tad too short (I needed about 62 inches) so I covered the excess with some left over aluminum flashing I had laying around.
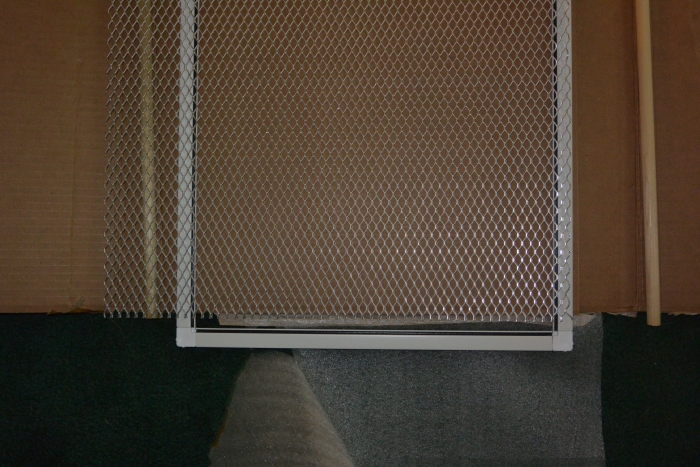
- Lay the frame on the floor so that the black gasket is facing up.
- Do a final measurement of the width of the frame.
- Using a magic marker, draw marks on the grid for that width or just a tad smaller so that the jagged edge doesn’t protrude past the width of the frame.
- Cut the grid along the marks. I tried to get close to the weld between the cells. I found it easier to snip snip snip each individual cut one at a time instead of trying to cut it through all at once like wrapping paper.
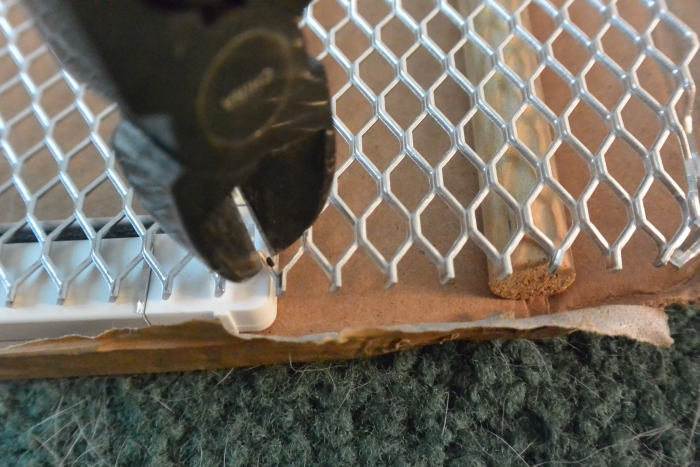
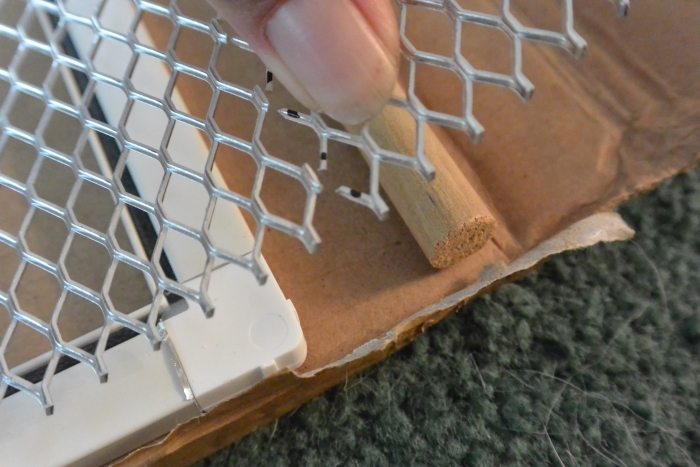
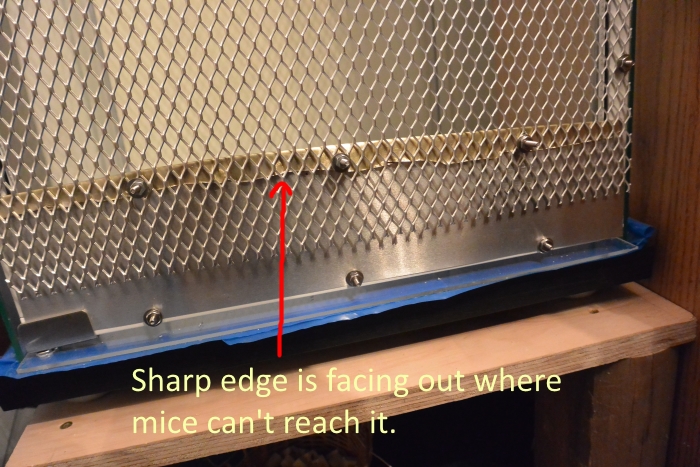
- Take the flashing and fold along the long side so that the edge is no longer sharp. It doesn’t matter how much you fold down as long as you have enough height to cover the shortage in the grill.
- Place the flashing at the bottom of the door so that the bottom is flush with the bottom of the frame and the original sharp edge is facing up. The idea is to have only the folded part facing the inside where mice can reach so that they can’t cut themselves.
- Put the grill on top of the frame so that it is flush with the top and overlaps the flashing at the bottom.
- Using a magic marker, put a dot where you’re going to drill holes to secure everything together. Make sure the dot is in the center of a grid cell but as close to the middle of the frame width as possible. I used 9 holes down each side, 2 along the top, 3 along the bottom, and 3 along the top of the flashing to hold it to the grid. Be careful not to put a dot where you’ll drill through the corner piece of the frame.
- Now it’s time to drill. Make a hole for each dot
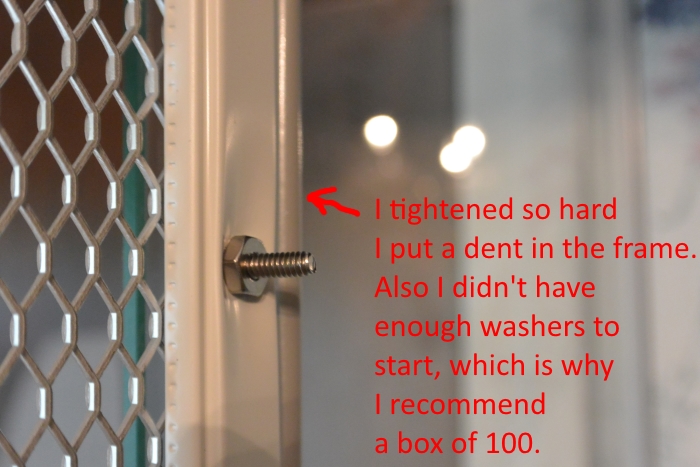
- Use the machine screws and nuts to attach the grill and flashing to the frame. Use a washer on each side of the frame. I put the screw head on the inside.
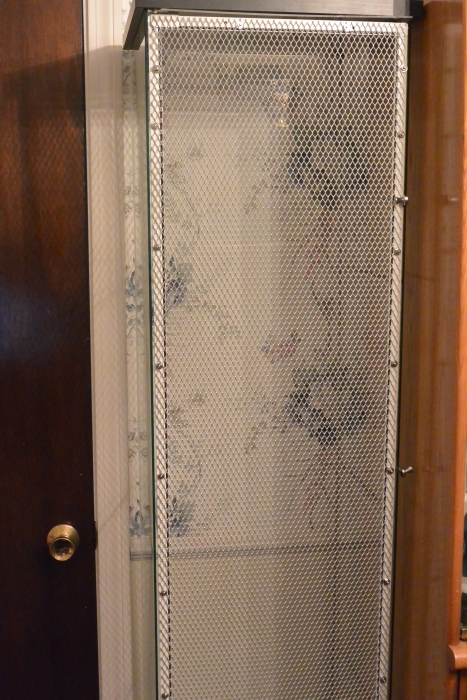
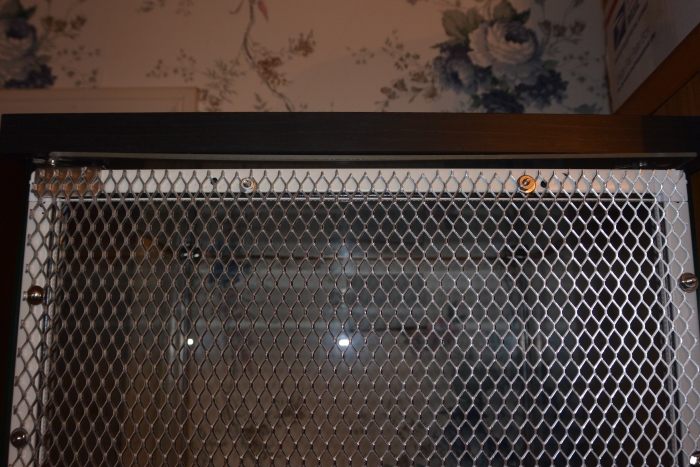
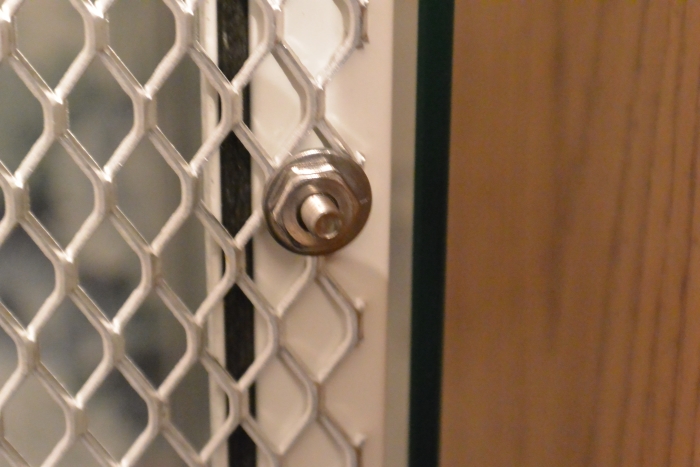

VERY IMPORTANT: Only tighten until the nut is lightly snug. If you over tighten, you’ll dent the frame (which I found out the hard way).
- When you’re all done, put the door back on the cabinet.
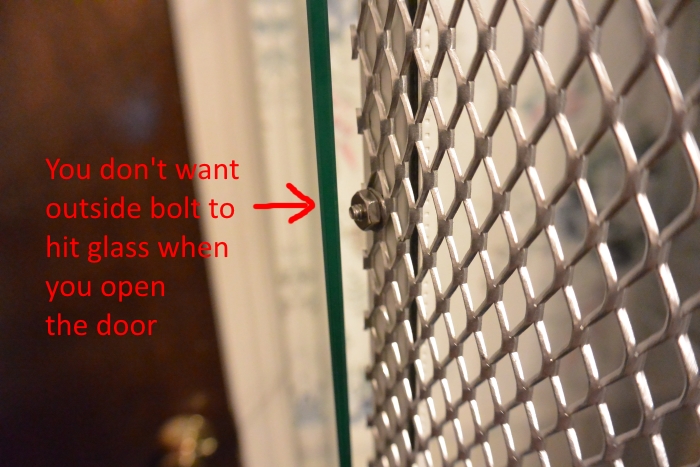
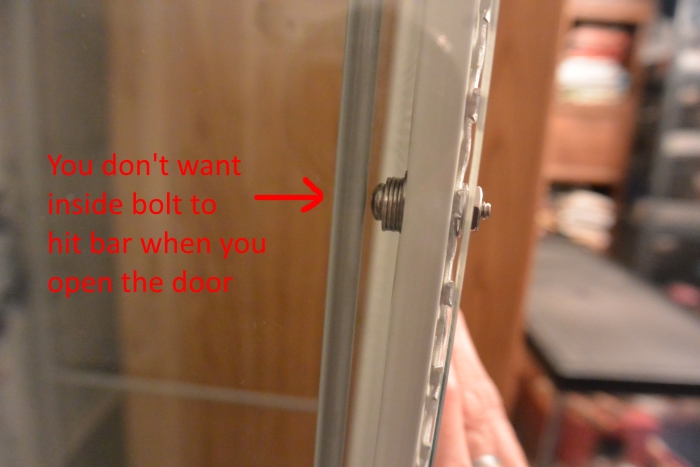
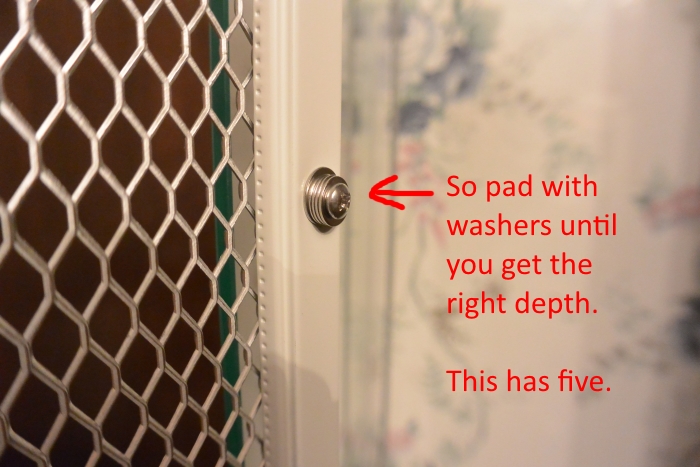
- One tweak you’ll probably need to do: I found the end of the bolts came in contact with the glass side on the hinge side when I fully opened it. So I had to add washers on the inside for just that side of the frame until the bolt didn’t hit on the outside and the screw head didn’t hit the vertical bar on the inside.
Making Shelves
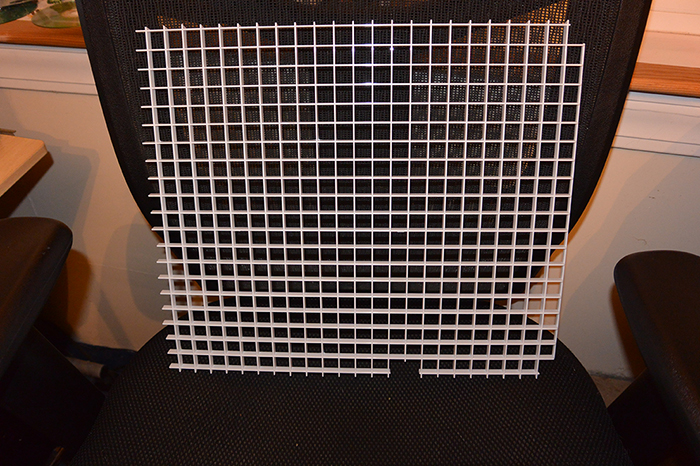
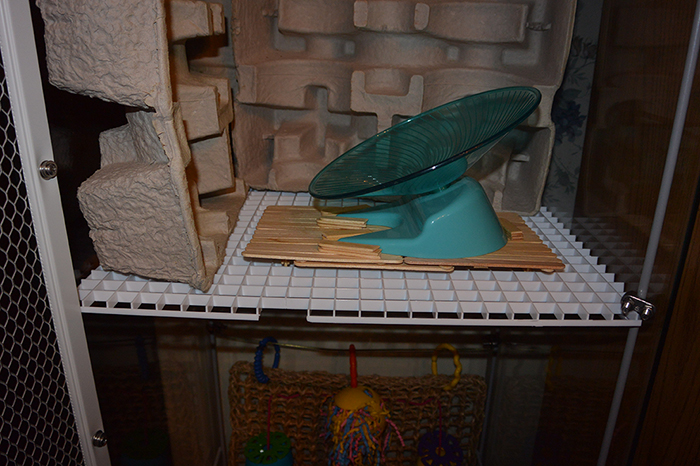
Egg crate is a plastic grid used in ceilings, but many pet owners use it too. It comes in a 2 x 4 foot sheet. I use this as shelving, supported by four cable clamps. This way I can hang things from it. Note: if you put it where the horizontal bars are, it seems to be ok without the cable clamps.
Use wire cutters and cut out a piece 15 1/4″ x 12 3/4″. It comes to 23 1/2 cells x 20 cells. Cut one cell out on the two corners on the non-half side to accommodate the vertical bars, and a little opening next to the grid where they can climb through. They can fit through anyway between the door grill and the edge of this shelf, but cutting a little opening will make it easier. If you have any vertical pieces left that you’ve cut off, save those for ladders.
For more info, here’s my video about using egg crate:
Making the Bedding Box
For me, this is the most fun part. I love working with acrylic cement. Weld-On 3 isn’t ordinary glue. It’s the consistency of water and it actually causes a chemical reaction that bonds the two pieces of acrylic together, then evaporates off. They use this to make acrylic aquariums so it’s considered to be pretty safe.
Tap Plastics has great training videos:
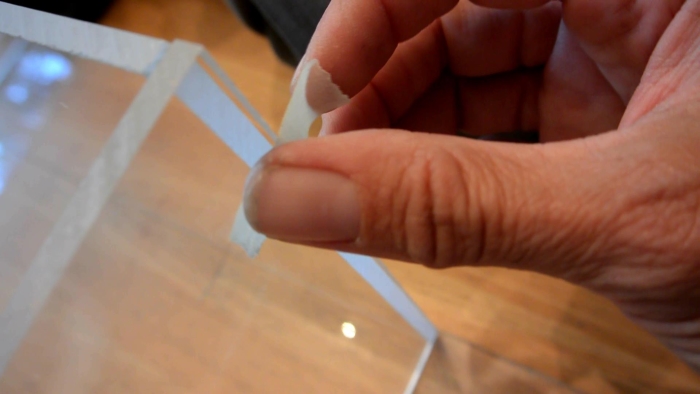
The only thing I do a little different: since you glue the walls together first but the ends all have to remain flush so that they’ll fit snug against the bottom, I cheat a little by creating the box ahead of time without cementing it, then tape the sides together with masking tape that will come off easily. This keeps the sides perfectly aligned during the gluing process. Then I remove the tape and glue the bottom on.
For a more in depth explanation, see my instructions on Making Plexiglass Shelf Boxes and scroll down to “Gluing the Pieces.”
The final dimensions of your box (unless you want to make it narrower just in case) are going to be 14″ x 12.5″ (7″ tall). Which means the 13.5″ sides will be inside the 12.5″ sides, adding the thickness of the plexiglass to the width. Hope that makes sense.
Making the Door Locks
This was the hardest part to figure out. The door needs to be able to lock so that the mice can’t escape, but I can easily open it without putting too much strain on the flimsy frame. After trying different things that didn’t really work, I’ve decided on this:
I made a very simple door hook out of a coat hanger. It basically looks like this:
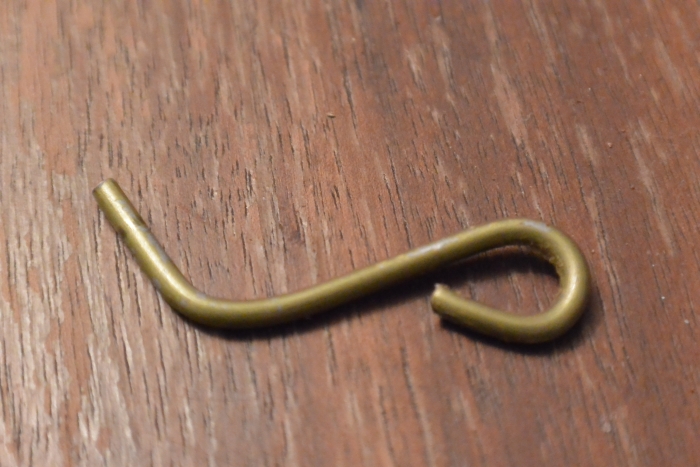
The vertical shaft is held to the inside bar via a cable clamp. The loop sticks through the gap we left and remains outside the cabinet. Then to lock it, I just stick a strong magnet (the kind with a knob) on the loop, which blocks the door from opening.
To make these, I bought what’s called a Wire bending jig. It’s a metal rectangle with different grooves and pegs, designed to help you bend thick wire into different shapes. You can either screw it into a work table or hold it with a vise. (I also bought a vise; the kind that you can attach to a counter).
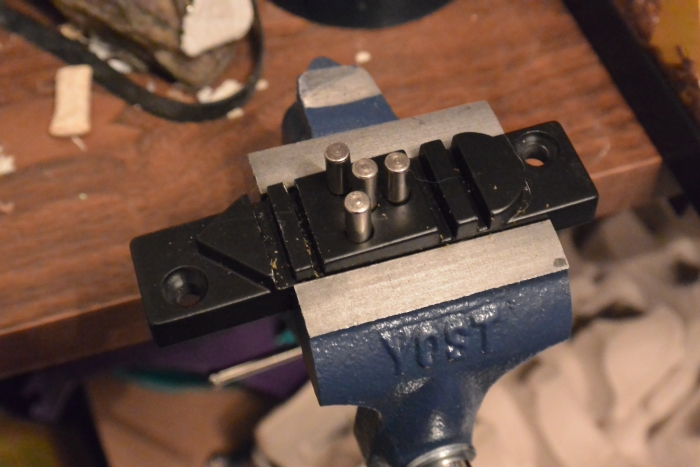
What I found works best:
- Cut a piece of coat hanger, about 4″ long.
- Use the jig to make a loop on the end.
- Put a little bit of a bend in the wire right where the loop starts so that the loop will be held away from the door and won’t block it from closing.
- Hold it up to the cabinet so that the loop is outside. Make a mark where the wire hits the vertical bar.
- Go back to the jig. Bend a 90 degree angle at that spot. TIP: If you make the hanger a little longer than needed, you can always adjust be making the bend more like 45 degrees which will put the loop lower down outside the door. But if you make it too short, the loop will be obstructed by the door and you’re back to the drawing board.
- You only need about 1″ to go under the cable clamp, so you can trim the rest off.
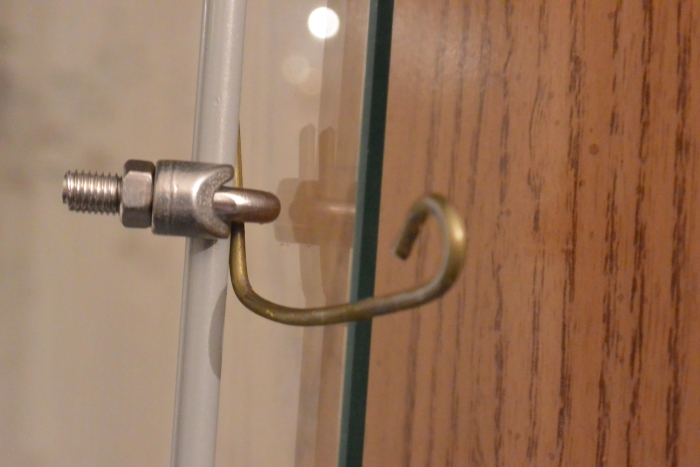
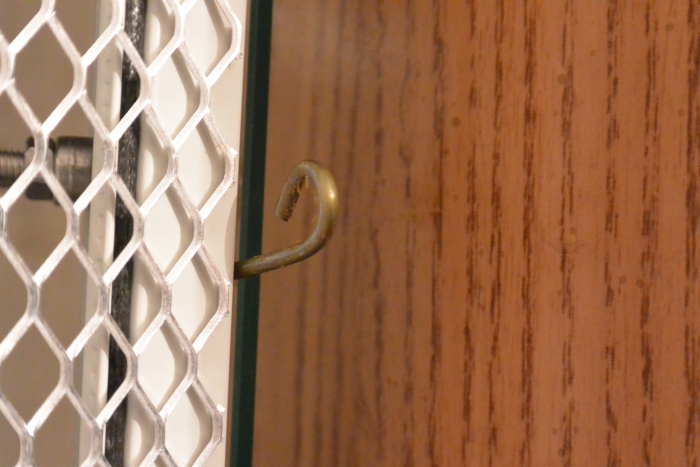
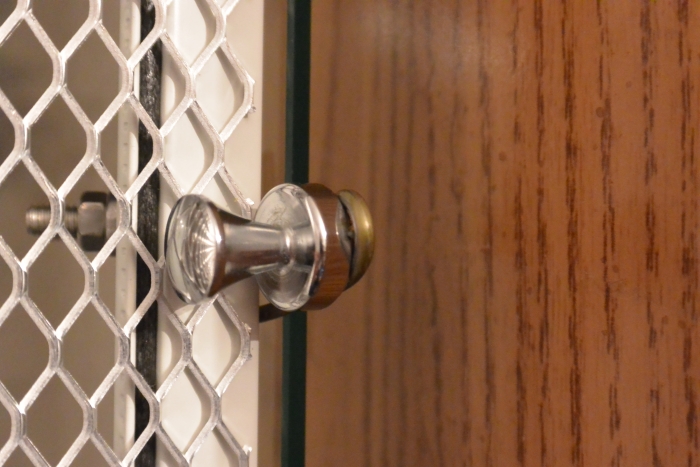
I use four of these locks. As long as the magnet is strong, they shouldn’t be able to open the door. TIP: to open it yourself, don’t pull the magnet off straight which will cause the wire to knock against the glass when the magnet releases. Instead rock it off. You can stick it on the back of the loop until you’re ready to lock the door again.
Secure the Cabinet
Finish the assembly by screwing the four nuts that came with it into the top.
Then use the second bracket to bolt the cabinet to the wall where you’ve marked the stud. Drill a hole into the top of the cabinet on the same axis and attach the bracket to the top. This is the only time you actually have to drill into the cabinet. I’ve heard of one of these bad boys (90-pounds) falling over when a dog knocked into it; better safe than sorry.
Toys
I’m still adding toys and enrichment opportunities to this, but so far this is what I have:
Egg Cartons
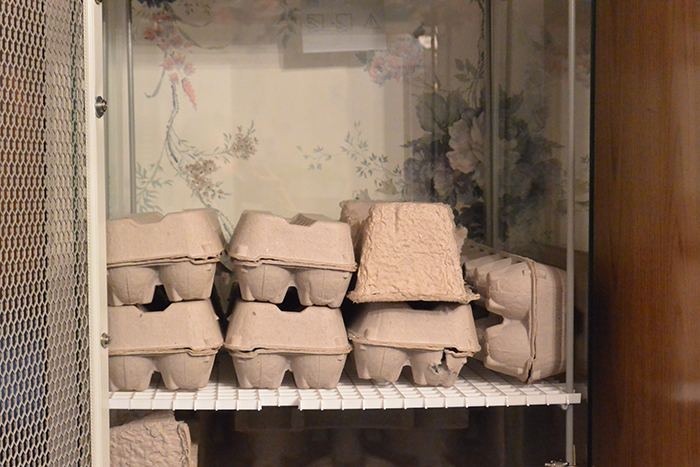
You can buy them in bulk from Amazon. This is a great option because you can get them without labels. These are the egg cartons I bought: 140 for a little over $44. It comes to about 32 cents each. They’re a little flimsy to use for packaging eggs, but for my purposes, they’re perfect.
Flying Saucer Wheel
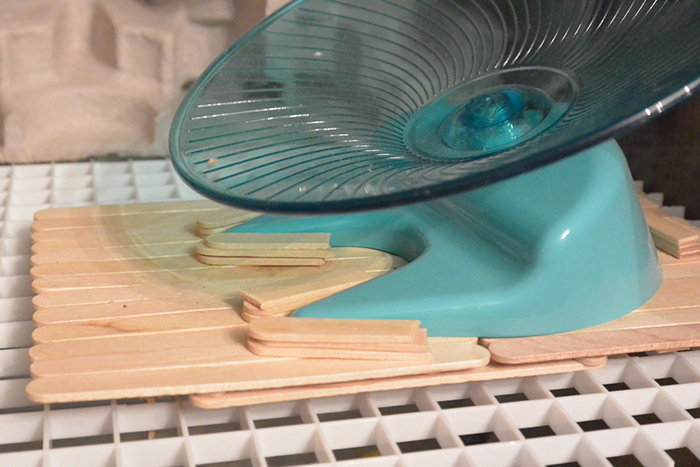
I made a little stand out of popsicle sticks so that it won’t shift around. The stand also has little feet to hold it in place on the egg crate (when making it, put a spare piece off egg crate over the bottom so you can see where to clue the feet, and shift them around while the glue is still wet. I use non-toxic Elmer’s school glue.)

Foraging Wall
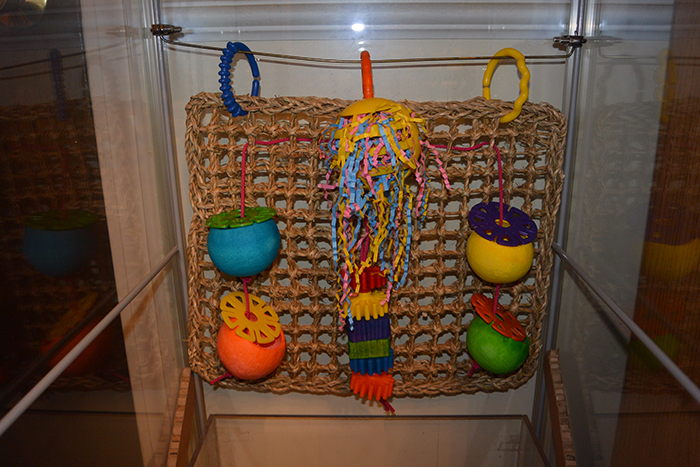
This is a wall sold for birds. It’s made of sea grass and has little wooden places to hide treats. I used a piece of coat hanger under cable clamps (seriously, they are the greatest things!) to clip it on. This is the foraging wall I got.
Climbing Wall
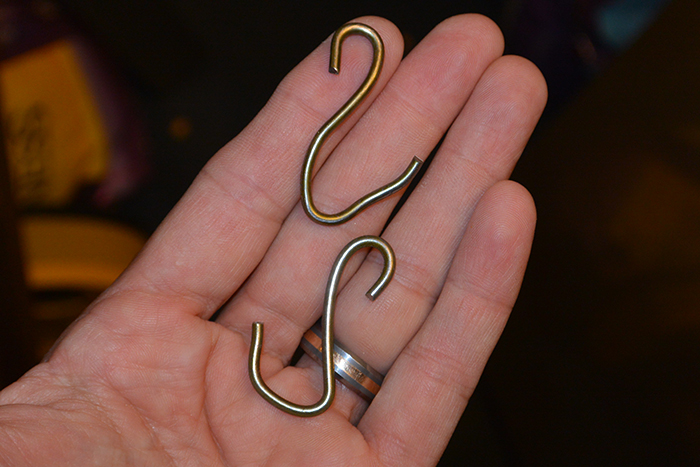
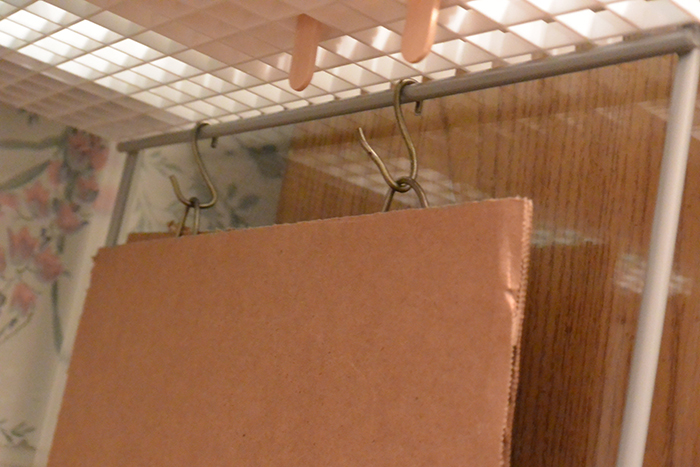
I plan to glue more egg cartons and toilet paper rolls on a cardboard wall. To hang it, I made loops out of coat hanger wire and secured them to the back by gluing a piece of cardboard over them. I made hanging hooks that go on the vertical bars.

Cardboard Spacer Things
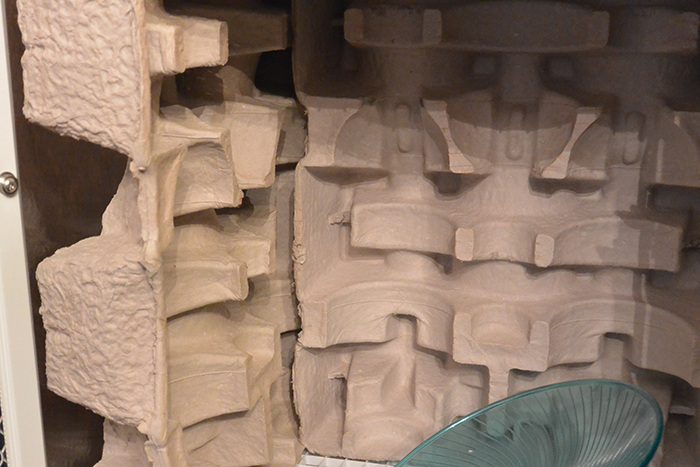
I have no idea what these are called, but they’re pressed paper things that are used in shipping boxes. Anything like this is great, such as those trays you get at Starbucks or McDonald’s for carrying four or more hot drinks to your car.
House
I made a little house for them, loosely based on this video of a very elaborate hamster house. By loosely, I mean that I used the brick pattern when making the roof and I also have a hanging door. I did not give it a floor because I want it resting on the bedding material, otherwise they’ll just pee on it. Note: my bedding of choice is coconut coir. I used to use paper-based bedding, but my pet rats all got mites from it, even after freezing it for 48 hours. So now I use coir which comes from the shells of coconuts. It comes in bricks. I freeze it first, then pour water on to expand it and bake it dry. It’s great because it is very low dust, it mimics their natural environment, and it controls odors like you wouldn’t believe.

Lastly, add mice!
Here are a couple of videos that inspired me to make this: